Advanced Tips for Mixing & Mastering in FL Studio
Posted by Esteban Miranda on
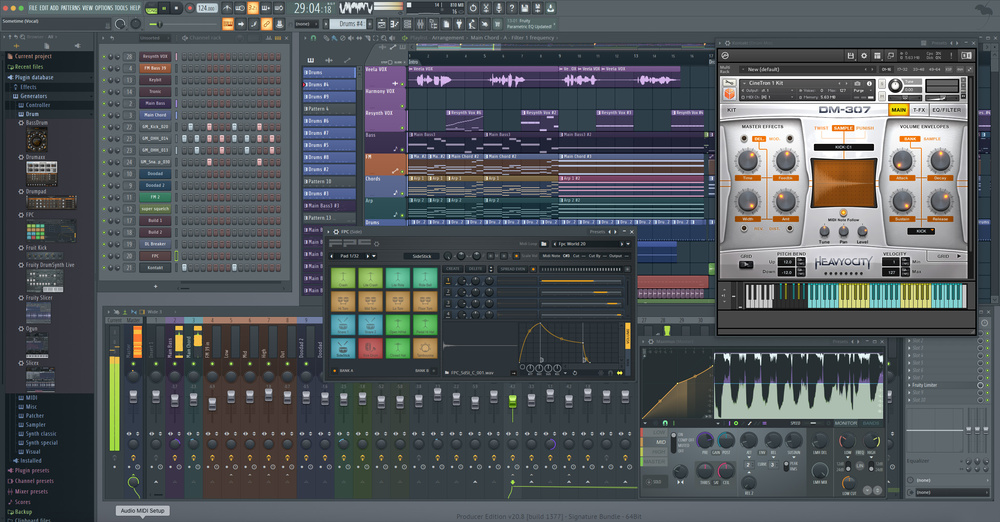
FL Studio is an extremely versatile DAW, capable of a wide range of musical tasks due to its unique build and the workflow possibilities this allows for.
We recently covered a beginner's guide for FL Studio, but in this guide we are going to take a bit of a deeper dive and cover some more in depth tricks for Mixing & Mastering.
In this guide we will cover:
- Mixing tips for FL Studio
- Mastering tips for FL Studio
- Some other workflow and general tips thrown in along the way!
Let's dive right in.
What is FL Studio?
If you're unfamiliar with the DAW, this guide may not be for you. Make sure you have a comprehensive understanding of using FL Studio before you read this.
FL Studio is a unique DAW, which has made a name for itself as being the go-to DAW of several big producers, but also because of how unique it is in terms of the features, workflow options, and how everything is customisable and you can move things around to accomodate whatever way of working you like.
FL Studio is renowned worldwide by professionals and hobbyists alike, but as we said, if you're not familiar with it, you might want to check out our Beginner's Guide on FL Studio before reading this one.
So, with that out of the way, let's dive in.
Mixing & Mastering
Mixing & Mastering are two crucial stages in the music making process. Once the "musical" stages are done, you move over onto first mixing and finally mastering your music.
It's worth noting that in a lot of cases if you're releasing music with a label, or even doing it yourself, you may have a dedicated Mastering Engineer do the master on your track for you. So while there's some argument to be made that you don't need to worry too much about becoming a mastering expert, you should at least know the basics.
Mixing, on the other hand, is something you should be super comfortable with a music producer.
It's a crucial stage in taking your musical ideas from rough arrangements to finished tracks, so you need to be comfortable with the concepts.
The Mix and the Master are two separate stages, and you should be aware of this, and what it means for your process. You'll be using FL's Mixer to manage your mix, and there is a Master Output channel where you can set your mastering chain.
However, this isn't the only (or ideal) way to handle the mastering of your tack.
You could finish your mix, bounce out your track as a new audio file, and then create a new project and apply your mastering to this.
The former method has the potential to create issues, where you might be going back and tweaking elements of your mix while you're trying to do a master. This is a guaranteed way to get things confused. Your mix should be finished by the time you get to doing your master. Mastering with the second method means this is more easily done, as you can't tweak the mix if it's just one audio file.
So, with those concepts firmly applied, and all proper disclaimers in place, let's move onto the tips!
Mixing Tips
1) Learn to properly balance your levels
Mixing your volume levels is possibly the simplest trick in the book, but mastering it is far from easy.
The pinnacle of any mix is good volume balancing. You can apply all of the effects you want, but if your volume levels aren't balanced, things are going to sound sub-par.
Not only should balancing the levels be your mixing starting point, it should also be something you're regularly checking as you work through your mix. Because inevitably your levels, and the balance between them, will change as you add effects like compression and EQ.
On those last points, EQ and Compression won't help at all if your levels aren't first balanced as a starting point.
So, there are a few tried and tested methods for getting this trick in the bag.
This one may seem obvious, but it needs mentioning.
Mix with your ears, not your eyes.
It's super easy to try and mix your track visually, looking at where volume faders are in the mixer and working off of these, but the reality is that you need to use your ears.
For general mixing purposes, or if you're mixing a particular track to balance the levels, turn it all the way down, close your eyes, and then slowly bring up the volume, stopping only when it sounds right.
This is an essential skill, and it's something you'll be constantly tweaking. Balancing your levels is your first task in a mix, but you'll be constantly rebalancing as you add effects and other elements.
2) Docking & Separating important tracks
When you're mixing, there are certain elements which are crucial in your mix, and you'll want to keep your eye on these at all times. Luckily, FL Studio allows you to dock important tracks in the mixer either to the left or the right hand side.
Simply Right Cick the track in question, and select Dock to > Left/Right to ensure it's always in your sphere of vision.
When you're mixing, there's a huge amount of organisation involved which can help speed things up and make things more efficient. Another way you can keep tab on your mixer tracks is by adding in Separators.
FL Studio allows you to add Separators between tracks in the mixer, allowing you to more easily visualise certain groups. You can do this by Right Clicking and selecting Separator.
This adds a thick bar which gives a solid break between different groups of tracks.
This is super useful, especially considering you can now get granular with your level balancing in your mini-groups. You can add Separators on either side of your drum parts, so you know they're all together in the mixer.
These types of visual organisation tools are essential for maximising your potential when mixing.
3) Fruity Peak Controller
Beloved by FL users the world over, Fruity Peak Controller is a great way to add dynamic ducking and sidechaining to your mix easily and quickly.
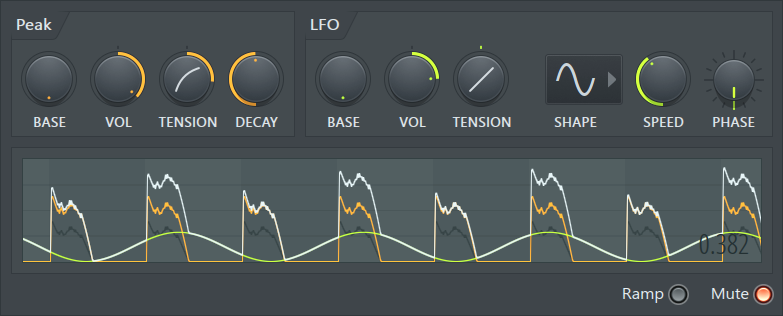
Sidechaining is a crucial part of modern electronic music production, giving that trademark pumping sound to whatever you decide to throw it onto. Knowing how to use it effectively can dramtically alter a mix.
Fruity Peak Controller is used to automate the levels of a target signal, in response to the volume envelope of an input signal. You can also use the onboard LFO to control the levels of the target signal too.
What this means is, you can throw Fruity Peak Controller onto a track such as your kick, and then use this to control the signal of other channels in the mixer, dramatically ducking their signal to create that trademark sound. You simply set up the mixer routing you want, and adjust the parameters of Fruity Peak Controller accordingly.
However, you don't only have to use this to get the dance music pump. You can use it if you want to have a particular element in your mix shine above the others at certain times, ducking any signals that are conflicting with it.
It's a great tool to help with all sorts of mix scenarios, so make sure you try it out on your next mix! Check out the video below for a detailed look at how you can use this.
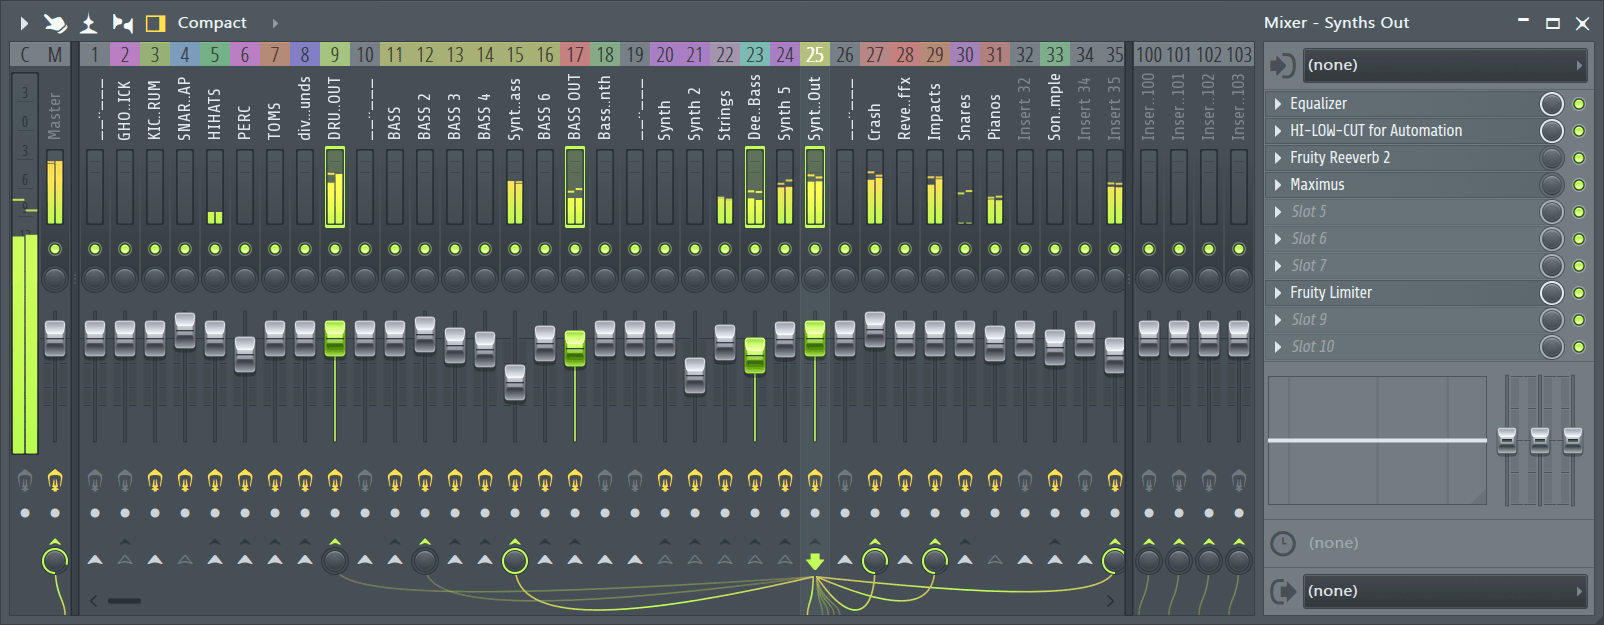
4) Mixer View Modes
FL Studio has 8 different view modes for the mixer, from Compact to Extra Large.
You'll want to set the corresponding view mode to ensure you're getting the most out of your mixer. If you need to be seeing detailed information about each individual track, you're going to want to avoid Compact Mode.
However, if you want to use the mixer to get overall impressions of your mix balancing, then Compact mey be perfect for your needs!
You can see a visualisation of each of the different Mixer Modes below, to see which one will suit you most!
5) Soundgoodizer
Sometimes, something isn't sitting right in a mix and you're just not sure why.
Luckliy, FL Studio has you covered, with its wonderful (depending on who you ask) Soundgoodizer plugin.
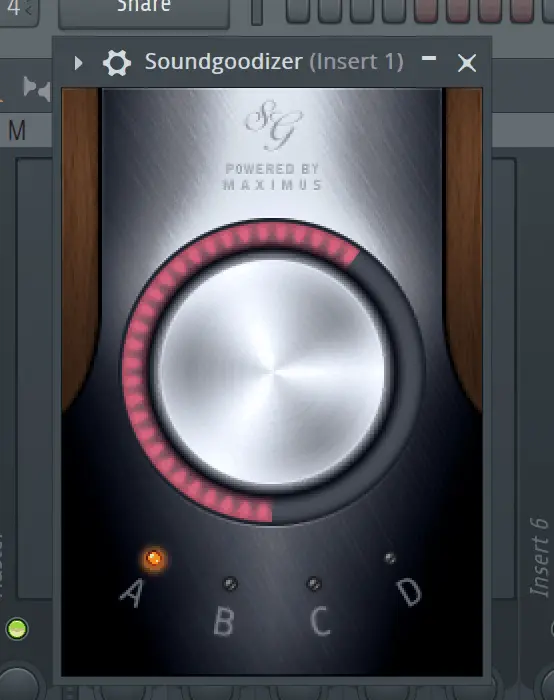
In some cases, throwing an instance of Soundgoodizer onto a troublesome track can just fix it.....somehow.
But what's actually happening?
Soundgoodizer is a multiband compressor, which helps make things sound fuller.
It has four different settings, and one big control knob, so there are only a few controls to mess with, but this is the beauty of it!
Load it into a free FX slot, select one of the four options and turn the control knob. It's that simple!
Gettings things to sound good in your mix is sometimes a 'there isn't a wrong answer' situation. If throwing this plugin onto something makes it sound good, then hasn't the plugin done its job perfectly?
Mastering Tips
Now that we've just covered a few tips to help you get your Mixing skills in the bag, so now we can move on to Mastering.
As we mentioned earlier, there are two primary ways you can apply mastering in FL Studio.
1) The Master Output channel in the mixer can be used to apply mastering to your tracks. However, doing it this way can mean it's tempting to jump back into your mixer and make mix adjustments, which can muddy the whole process.
2) Finalising your mix, bouncing it out as an audio file, and then importing this into a new project and applying mastering in this way. Doing it like this means you can focus on the mastering process separately, ensuring you don't get confused about what you're working on.
So, let's look at some practical tips to help you master in FL Studio.
1) Multiband Compression
This is an essential tool in any Mastering Engineers arsenal, and you can learn to use this to boost your tracks to compete with professional sounding mastering.
In FL Studio you have two options for Multiband Compression, namely Fruity Multiband Compressor and Maximus.
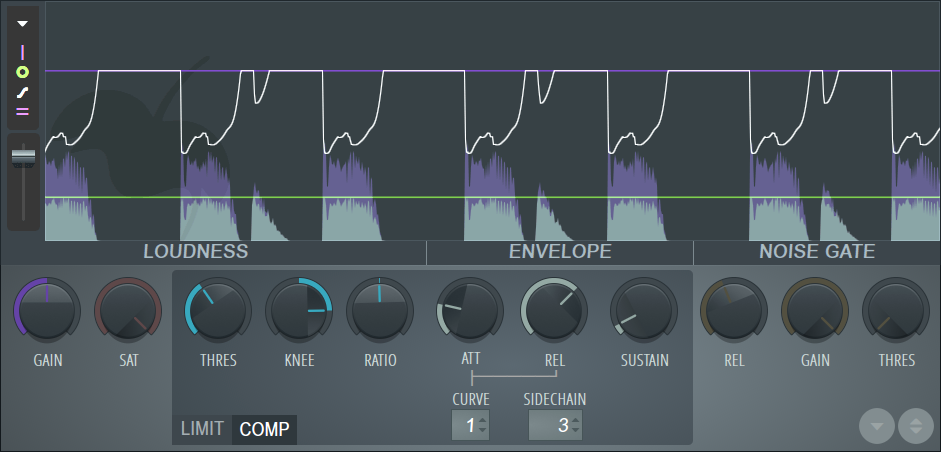
While both will suit you, we are going to focus on using Maximus for this tip, as it has more advanced features which will help you.
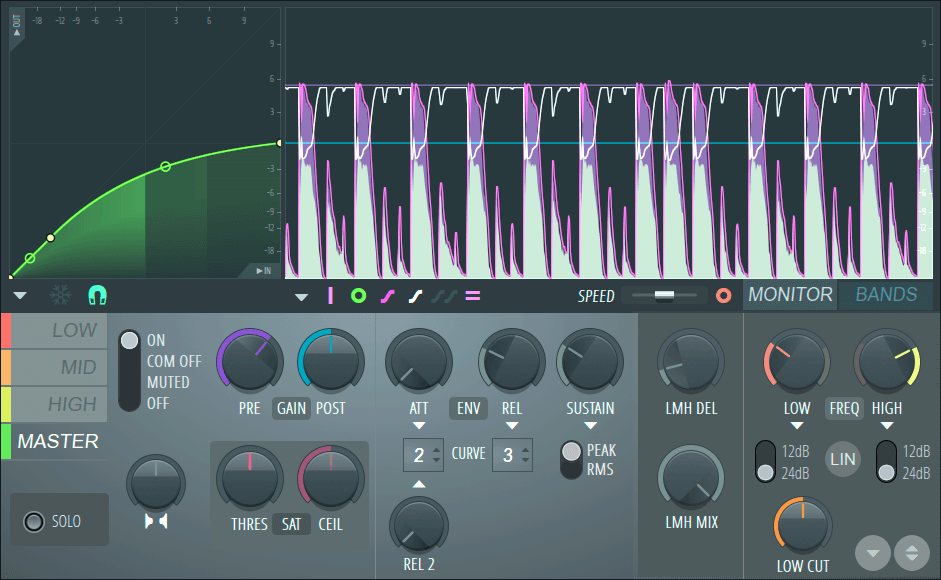
Maximus is a super powerful unit, which not only excels as a Multiband Compressor, but is also a Limiter, Noise Gate, Expander, Ducker and De-Esser.
It also excels as a final-stage mastering plugin, or as a per-track effect. It's definitely worth your time to check out this plugin!
Multiband Compression works by splitting your audio spectrum into different frequency bands, and applying different rates of compression to these bands. It gives you added control over your audio through precise manipulation of different frequency bands, and it also allows you to gel bands together with the single bad master compressor.
So, the reason this is so good for mastering, is because this is the phase in your process where you want to be finalising things. If your bass and kick need a slight boost, you can apply compression to the low end without affecting any other elements.
You can solo individual bands to see exactly where you want the splits to be, so you can tailor Maximus to your specific needs.
Generally speaking, it's good to apply some harder compression to the lower bands, slightly less compression to the mid band, and subtle (if at all) compression on the high end, boosting the gain slightly.
You can then use the master band as a single compressor to gel all of the bands together to give some clarity and cohesion across your master.
Maximus is a super powerful plugin, and works really well in a mastering context, so get experimenting with it to see what results you can get!
2) Tame your Low End
You'd be surprised by how much of the sonic content in samples and synth sounds exists in super low frequencies. So a good habit to get into is using EQ to cut anything below 40 Hz.
This is because things below this 40 Hz mark are inaudible to human ears, but they can take up valuable headroom when it comes to your mix.
Cutting anything below 40 Hz using Fruity Parametric EQ 2 is a great way to tackle this.
3) Saturation
Returning to our good friend (and all around mastering powerhouse) Maximus, we can also apply some slight saturation.
In this context, it's known as harmonic exciting, and it does pretty much what you'd expect a process called exciting to do.
It adds a little bit of colour and flavour, and generally makes things sound better, and slightly louder.
In general, adding in some light saturation (even with a third party plugin) can make a mix or a master shine.
4) EQ Master
EQ is a crucial part of your mastering process, and will ensure any oddities caused by the other steps in the chain such as Multiband Compression, Saturation etc, are tamed.
Sometimes when you apply multiband compression, you can lose some of the high end detail, so applying a subtle boost of your highs back in with Fruity Parametric EQ 2 can help with this problem.
While the majority of your EQing in the producing and mixing process will be on an individual track level, or maybe even a group level, you'll be using it quite differently on your master.
You want to sculpt the overall tone of your track, so making sure you get this rights is vital. Using a mixture of Multiband Compression and EQ helps to achieve this.
5) Fruity Limiter
When dealing with a master, you don't want your overall levels to be peaking too high.
When levels are too high, this can create distortion of your audio, and if anyone hears distortion in a master, it's going to stand out as an amateur job. While you can create intentional distortion at some stages of your production process, the mastering stage is rarely where you want to be doing that!
So, ensuring your throw on Fruity Limiter and putting a hard limit on at -0.1dB means that your levels won't jump over 0 dB.
However, one thing you need to make sure to remember is to bring up the Gain control. This can help to increase the perceived loudness of your song, all while making sure it keeps well under that 0dB level.
Perceived Loudness is important when it comes to finalising your mix and your master. It may seem strange to the average person, but the actual loudness and the perceived loudness of your track are two different things.
The 0dB level we discussed is the actual loudness control, where you can't let things go above that for distortion reasons, whereas the perceived loudness is how loud your music sounds, which you can help with compression and limiting.
Beyond the Music
So, in this guide we've covered 10 tips on Mixing and Mastering in FL Studio.
These are crucial parts of your process, and while many release situations may see you having your music mastered for release by a dedicated mastering engineer, it's worth knowing your way around doing it yourself for times when this isn't the case. If nothing else, it allows you to give feedback on any masters you do get done using terminology that the mastering engineer can understand as well.
Mixing is fundamental, so hopefully these tips helped you hone in your skills even more, and give you some direction in where you're going with this side of music production.
Being a music prodcer means being a jack of all trades; there are so many tools and skills we need under our belts. It's important to regularly remind yourself of what these different skill sets are and how we can be keeping our minds fresh and our craft on point!
If you're in the market for some resources on this last point, you should check out our FL Studio Projects here at flpstudio.com!
We have a dedicated team of producers working consistently to bring fully fleshed out, professional quality recreations of some of the biggest dance music tunes out there, and these are an amazing resource for your producers! See what deals we have available, and then you can really sink your teeth into an FL Studio project, full of all the rich deatil and amazing tips and techniques you'd expect to find in a professional, studio quality mix.
Thanks for checking in with us, and come back soon!