Fl Studio Beginner Tips
Posted by Esteban Miranda on
As a relative newcomer to FL Studio, in that I have far less experience with it than Ableton Live or Logic Pro, I thought it would be useful to compile some of the best tips I've found in my own learning journey, to help anyone else out there who is new to FL Studio.
So, in this guide we will look at:
- Some beginner tips
- how to make the most of FL Studio
- where to get started
- and more!
Let's begin.
Fruity Loops
As with any DAW, it can be a little intimidating opening FL Studio for the first time. Even if you're familiar with your DAW of choice, making the change to a new one can be a daunting prospect.
For me personally, I found FL Studio a dizzying collection of windows and buttons, which were on the face of it super confusing. If this was you too, let's explore the interface together.
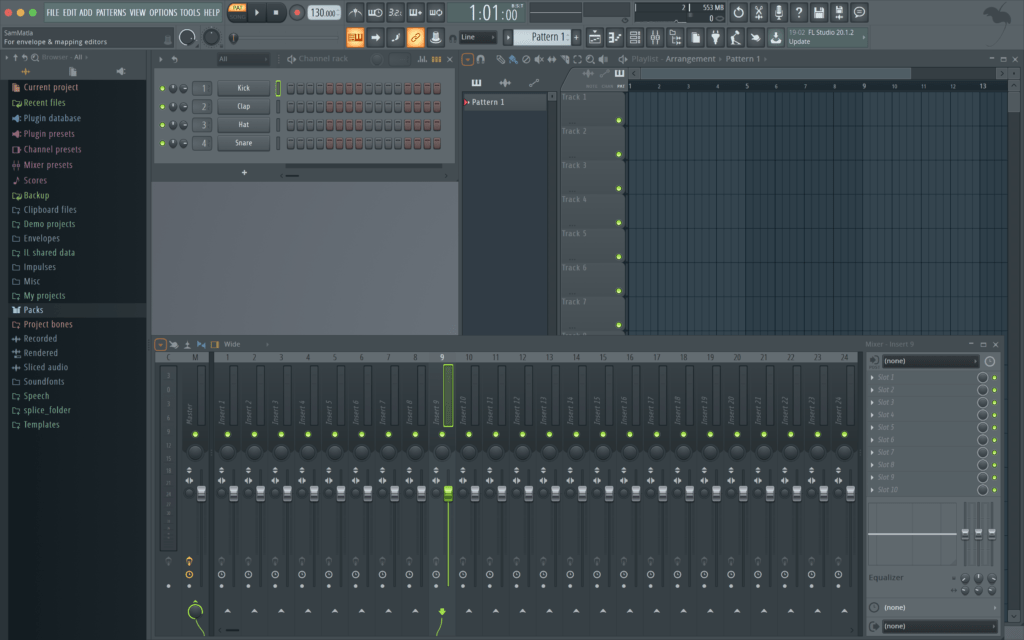
When you open up FL Studio, this is what you're greeted with.
Now, I admit I was confused because it's so unfamiliar compared to my go to DAW - Ableton Live. Interestingly enough, there seems to be somewhat of a rivalry amongst the fans of the two. I've even seen Ableton described as FL Studio's 'arch nemesis'!
But let's explore what we're looking at.
One of the coolest things about FL Studio is that each of the various windows that make up the DAW's main page can be moved around to suit the user. It's this seemingly infinite customisability that draws many users to FL Studio over other DAWs.
While I at first thought this was a bit of a novelty, I soon realised that being able to move, minimise and close the windows you don't need to focus on allows for a much more streamlined experience. Which is a far cry from what I felt when I first opened the program.
So, there's only one thing that's fixed in FL Studio, and that is the toolbar running across the top of the screen. This will be a comfort to seasoned producers of other DAWs, because it's a familiar concept. Both Ableton Live and Logic Pro have similar bars.

So we have the Transport section in the middle, which is where you'll find your play, stop and record buttons. No issues here.
You'll notice the little lit up button saying Pat. This allows you to choose between Pat and Song. These allow you to switch from working on a smaller pattern, in a Channel Rack (which we will look at shortly) to working on a full Arrangement.
As with other DAWs, there's also the time counter, as well as a display showing the load on your computer's CPU.
You'll also see a little drop down menu underneath the time counter which says Snap. This is essentially a quantization control. The dropdown allows you to choose how your notes are quantized - or snapped- to the grid.
Buttons, buttons and more buttons!
Now what makes FL Studio unique is the various windows and options within them. As I mentioned earlier, it's very customisable, with all sorts of unique windows and views that you can toggle on or off, and move around to suit your production style.
In the toolbar you will notice a whole row of buttons, each doing something different.

The first five -moving from left to right- are what we will focus on. They are: Arrangement, Piano Roll, Channel Rack, Mixer and Browser.
Now, the Browser is FL Studio's hub, essentially.
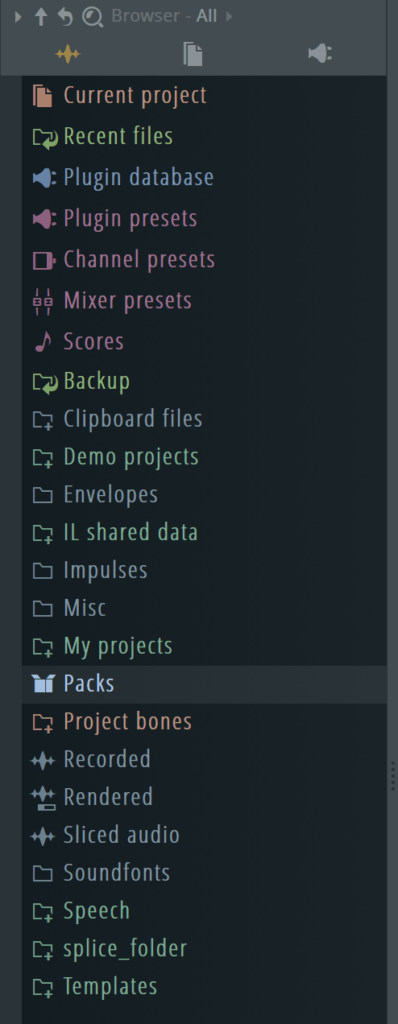 Anything you need will come from there. So if you want a sample, an instrument or a preset, this is where you'll look.
It's worth taking the time to explore the Browser section, because it's where all of the useful elements that will make your music live.
You can see there are various folders, icons and things to click through. So make sure you check them all out. You're really going to want to familiarise yourself with this section.
Next, let's look at the Channel Rack.
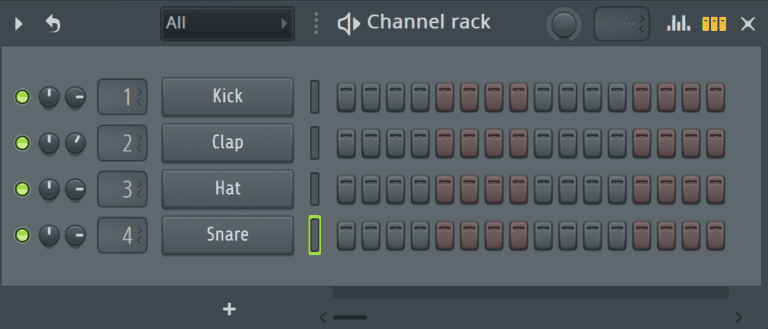
The Channel Rack is FL Studio's little idea machine. It's basically a step sequencer. Somewhere you can sketch out your ideas for your tracks.
It's loaded up with four stock sounds. But you don't have to use these. You can navigate to any sound or sample from the Browser, and simply drag and drop it over one of the boxes, or into a new one underneath.
I had a lot of fun with this part of FL Studio. You can drag in all sorts of sounds and samples, and within the Channel Rack, you can make a little looped idea. You can add synths, samples, drum parts, You name it. All with neat little features to adjust the pitch, rhythms and other fine tuning parameters.
Experiment here - it's a piece of advice I often give - to see how you find it, what works for you, and what you can get out of it.
I really like the Channel Rack.
Piano Roll
Any DAW user should be familiar with a Piano Roll. It's how we draw in MIDI notes for our instruments, and if we record in MIDI through an external device, it's where our notes show up.
The Channel Rack contains the Piano Roll for each part you load into it. If you're dealing with Rhythmic parts, using the Step Sequencer will be your best option, but for more Melodic parts, you'll want to use the Piano Roll.
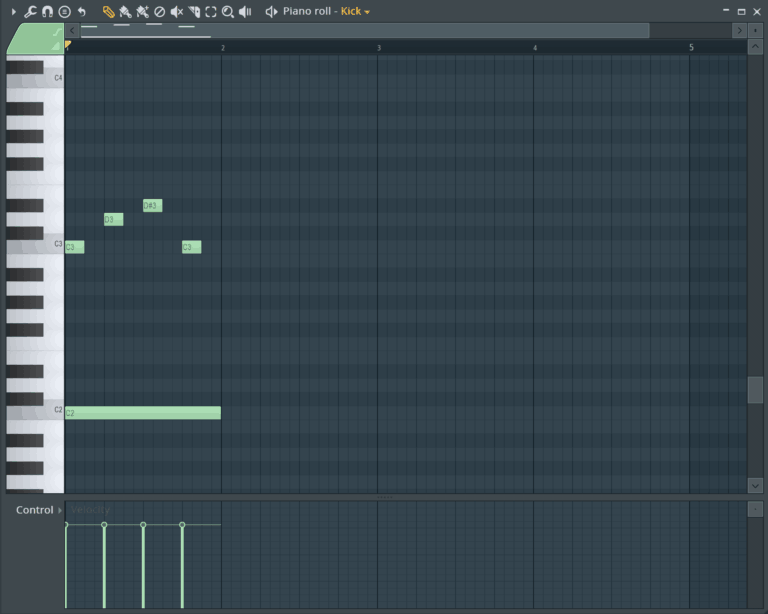
FL Studio's Piano Roll is renowned for its smooth usability, as well as its plethora of great functions. As you can see from the image above, it has the familiar features we know; a piano along the side, a timeline where the notes are drawn in, and a window along the bottom where the velocity can be adjusted.
But there is a lot more you can do. See those buttons along the top? They offer a wider range of features, and it's why FL Studio's Piano Roll is loved by so many producers.
Let's explore what they are.

- Draw: self explanatory, draw in notes and move them around
- Paint: paint in notes and repeat them by dragging
- Paint (Sequencer): paint in steps and repeat them (by dragging)
- Delete: again, self explanatory. delete notes.
- Mute: deactivate certain notes by clicking on them
- Slice: break notes into multiple parts by clicking and dragging a line
- Select: click and hold to select a group of notes
- Zoom: click to zoom in on all notes, click and drag to zoom into a specific area
- Playback: allows you to hear what notes are playing at a given time by clicking
Next, let's take a look at a section that will be familiar to us as users of other DAWs.
Arrangement
So, using FL Studio's unique Channel Rack, you've made a nice little pattern and you want to take it further. This is where you'll probably feel most comfortable, as the Arrange view in FL Studio is pretty similar to that of Ableton Live or Logic Pro.
You can drag a pattern you've made in the Channel Rack and place it in any track in the Arrangement section. But this section is where you get a lot more creative in terms of building your track.
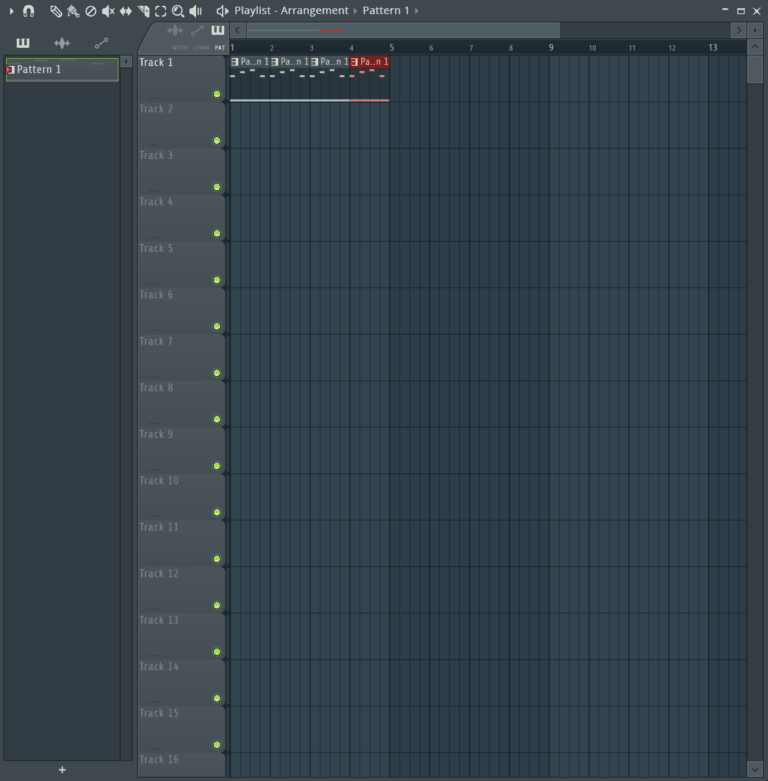
If you think of the Channel Rack as the place where you build patterns, and these patterns as the building blocks of your whole track, then the Arrangement section is where you build your track in full.
You can drag in more than just patterns. You can add Audio Samples, and directly structure them however you want, eliminating the need to use a Sampler.
You can also create Automation Clips here - which we will cover later.
The Arrangement section is your blank canvas, upon which you'll create your musical masterpiece!
The Mixer
This is another section where things are pretty self explanatory. If you're familiar with how mixers work in general, you should be able to figure this out yourself.
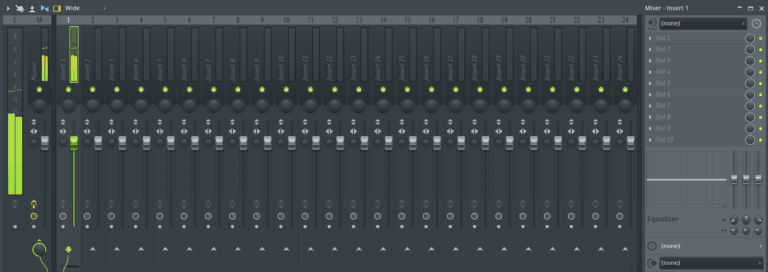
As you can see, FL Studio's Mixer follows a pretty standard layout. Your Master channel is the big one on the left, and going from left to right are your individual tracks. There is a lot of routing options for the Mixer, so you can assign where each track is getting its source audio from.
As you'd expect, each track has a volume fader, as well as panning, stereo imaging, and mute and solo controls. All pretty standard stuff. There are some more advanced features to dive into, so make sure you play around!
There are a bunch of green lines down at the bottom of the mixer which show the routing of each channel, which is by default set to go straight to the Master channel.
Inserts
The Inserts section is where you'll add effects to each track. Explore the various effects that FL Studio has to offer, because there's a whole host available!
Automation
So we briefly touched on this earlier, but let's just take a moment to explore how FL Studio tackles Automation.
It's one of the best tools in your music production arsenal, allowing you to add precise and finely tuned changes to how the effects and elements of your track progress.
If you're messing around with any parameter within FL Studio, you can right click on it and select 'Create Automation Clip'. This will create a new Automation Clip within the Arrangement where you can adjust the parameter to your liking.
Overview
So, that was a basic overview of the main features in FL Studio, focusing particularly on some of the features that are different from other DAWs available.
As I mentioned in the intro, I am far more experienced with Logic Pro and Ableton Live, so coming to FL Studio was a new experience for me. So it's through that lens that I wanted to focus in this article. If you're in a similar position; you're comfortable with your other DAWs but you wanted to try FL Studio, hopefully this has given you a good jump off point.
If, on the other hand, you're new to music production in general and FL Studio is your choice of DAW, then hopefully this gave you a good introduction to using the software.
Stay tuned for the next article where we will cover some more in depth tips to really get you making music with FL Studio!
As always, thanks for checking in with us, and be sure to check out our great deals on some project templates to take your learning to the next level.