Pro Tips for FL Studio
Posted by Esteban Miranda on
So in our last article we went over some beginner tips to get you up to speed with using FL Studio. As I mentioned, it's a relatively new software for me, as I have been using both Logic Pro and Ableton Live for just about ten years. Possibly more!

So moving to a new DAW is a challenge, but hopefully with our last article you feel a little bit more comfortable with using FL Studio. But, if you're like me, you don't want to just be competent at using it, you want to bring over the same level of second-nature knowledge and skill you have with your regular DAW into this new one. You want to be able to use all the little tricks that the program has to offer, all the shortcuts and features that you know so well in your usual program of choice.
So, that's what we're going to look at today. We will explore:
- some general tips and tricks
- tips for the Browser
- tips for the Channel Rack
- Piano Roll tips
- tips for bringing your tune into the Arrangement
- tips for the Mixer
So, grab a coffee, get yourself set up with FL Studio (we're using FL Studio 20 for this guide) and let's explore some more features!
General Tips and Tricks
Before you can go diving into the more complex and more specific stuff, it helps to know some tips that apply to FL Studio as a whole. These tips can be used at a program-wide level, or are applicable to all the various sections within FL Studio.
1) Saving a New Version
If you've ever played any strategy games like Total War, you'll be familiar with the feeling of wanting to try something, but not being 100% committed to the idea. No problem! Hit Save, try and win that battle, and if you don't, just reload and do something different.
Essentially, this is what Saving a New Version does. If you want to try out a new idea for your track, but you're not sure of it, or you don't want to lose where it is at its current state, just press Shift + Cmd (Ctrl) + S to save a New Version. Now you can experiment without having to worry about losing what you've already done!
2) Detached
One of the cool features of FL Studio is how all the various windows can float around and be moved, allowing you customise the visual side of the program to suit your workflow. But a hickup you can run into is when your windows are hidden by other ones.
If you're sick of this happening, navigate to the upper left corner and click the Menu > Detached, setting. This will ensure that your Window always stays on top. No worrying about losing your flow.
It's also worth noting that all plugins can be detached by default, by going to the General settings, finding the Misc. section and selecting Detach all plugins.
3) Give me a hint!
One of the features I loved about Ableton Live is that in the bottom left corner of the program, there's a window which displays info about anything you hover your cursor over.
FL Studio has its own Hint Panel, which is located in the top left. It will give you some detailed info over whatever you hover over, and will also offer some shortcuts for the control you're hovering over too!
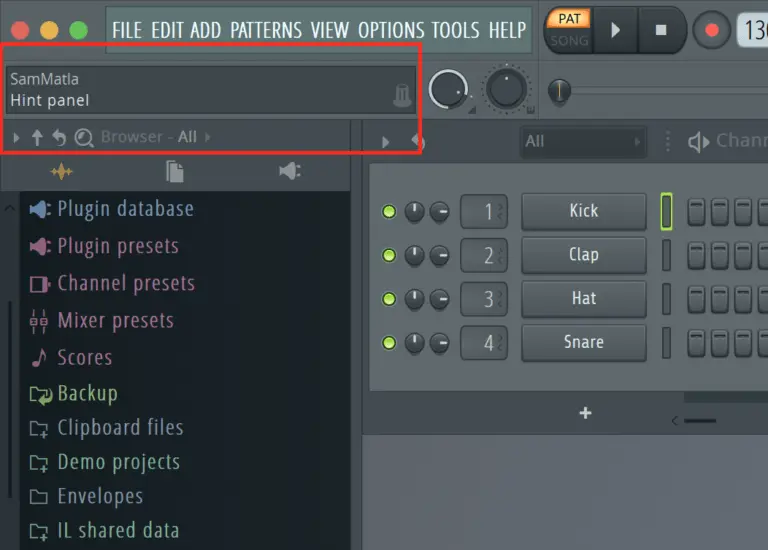
4) Hint bar
You can go one step further with Hints, and right click on the Hint Panel which will activate the Hint Bar. Now you have a transparent window that displays the hints for you, and its movable, which allows you to fit it into your workflow better. Plus it's much easier to see!
5) Fine adjustments
When you're working with Automation and other parameters, it can often get quite precise in what you want to do. Using Cmd (or Ctrl on Windows PCs) you can finetune any parameter when adjusting it. This allows you to get super precise with the controls. No more over or under adjusting!
6) Tap Tempo
The tempo display doesn't just have to be set by adjusting the number. If you hear a track you like and want to make a tune at that exact tempo, simply right-click to use the Tap function. Now you can tap the tempo you want, and your project will adjust to it!
7) Spectogram
It can be really useful to see the entire range of frequency that your project is taking up. Make sure you haven't got too much low end, or high end. Make sure everything is balanced. Just right click on the Oscilloscope up the top, and select Spectogram to change it.

8) Time Counter
Usually we like to see the time in our projects organised by beats and bars. But if you want to see a minutes and seconds based display, just right click the Bar Counter in the top bar and select Minute : Second : Centisecond to see how many minutes your track is clocking in at.
9) Time Elapsed
Much like I like to keep a track of my word counts when writing these guides for you all, it can be eye-opening to see how many minutes total you've spent on a particular project. Click F11 or navigate to the Options Menu and select Project Info.
10) Master Pitch
There's a Master Pitch control in your top bar, underneath the Help option. This allows you to change the entire pitch of your project. If you want to transpose it, no more fiddling with every single MIDI clip. Just use this and get a track wide pitch change instantly!
11) Colour / Icon
A great feature of Ableton Live is being able to label things and colour code them. It's saved me hours of trawling through menus to find the thing I'm looking for. You can do the same in FL Studio. Add an icon or a colour to any channel or track by right-clicking. Then it's instantly identifiable!
12) Split by Channel
You can split different instruments and sounds within Channel Rack into their own patterns. Simply click the pattern options and select Split by Channel.
13) Background
Do you love changing your desktop wallpaper? You can essentially do this in FL Studio! Click on View > Background to change it to an image or a colour. Great for personalisation!
14) Zoom
This one is a simple one, but it's super useful. Right click and drag up or down on the scrollbar to zoom in and out of any window.
15) Plugin Picker
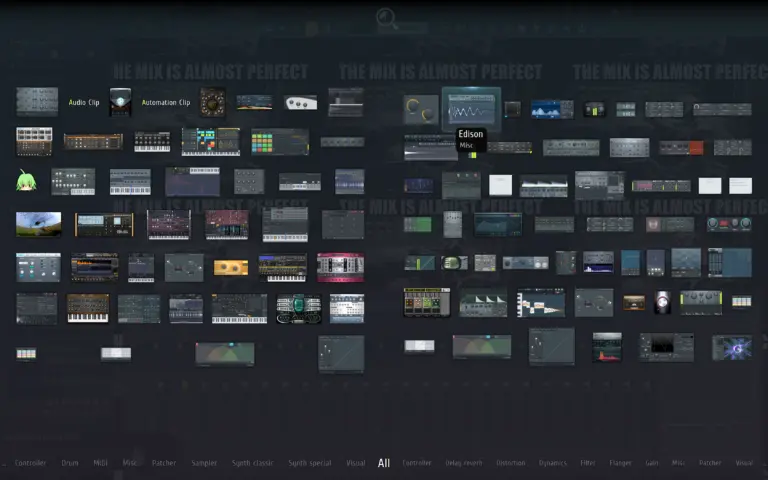
I love this one. Totally unique feature. Press F8 and this will bring up the Plugin Picker. It's a neat visual interface which allows you to see all of your plugins in one place.
16) Metronome Monotony
Getting bored with your metronome's default sound? Right click on the Metronome to customise its sound. Choose from four options; a tick (default option), a hi-hat, a beep and a cowbell.
17) Function Shortcuts
We all love a good keyboard shortcut to help us speed things up within our DAW. here are some useful ones!
Button |
Function |
F5 |
Opens up the Playlist |
F6 |
Opens the Channel Rack / Step Sequencer |
F7 |
Opens the Piano Roll |
F8 |
Opens the Browser |
F9 |
Opens the Mixer |
18) Computer MIDI Keyboard
Don't worry if you don't have a MIDI keyboard, you can still play notes into FL Studio. Just hit Cmd (Ctrl on Windows) + T and you can use your computer's keyboard!
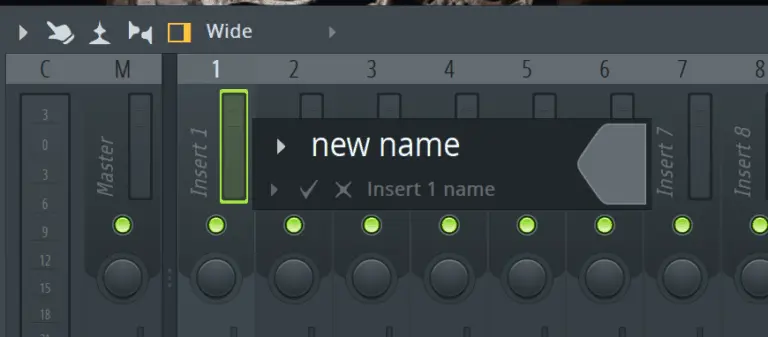
19) Quickly Rename
You can shift-click to rename anything!
20) Lock Active
Sometimes you want to solo something to do some fine tuning, but this automatically mutes everything else. Well, maybe you want one element to stay on, even when soloing other things?
Simple, just Shift-Click on thte green LED of any track to Lock it. Now it will remain on until you disable it, even when soloing other tracks!
21) Sound Killer
Sometimes when you hit stop in your DAW, you can have odd reverb trails or synths with endless decay or release still playing. It can be annoying right? Well, press Cmd (Ctrl on Windows) + H and all the audio will stop. Super useful!
22) Realign your Windows
I've mentioned that FL Studio's customisation is great. You can move all the windows around to suit your production style, but sometimes this can get messy, and you want to go back to the beginning and start again.
Well, you can. Hit Shift + Cmd (Ctrl on Windows) + H and all windows will snap back to their default positions!
23) Song Position
If you want to quickly jump around your arrangement or pattern, then you can use the song position slider in the top toolbar. This is a great way to scan through your project quickly.
24) Auto Scrolling
If you want the play head to follow along with your track, then click that arrow in the toolbar at the top to enable Auto Scrolling. Now the display with follow wherever the play head goes. Super useful so you don't lose your place, or have the actual audio or clips that are playing be off-screen
So, they were some general tips for FL Studio as a whole. Now let's look at some more specific tips.
Browser Tips
As I mentioned in the previous article. FL Studio's Browser is a super
useful part of the DAW. It's where you'll be referring for a lot of the parts you use within your project, so it's a good idea to learn how to use it.
To help you, here are some Browser specific tips.
1) Expand / Collapse All
The Browser is made up of different folders, which open up to navigate to what's inside them. This is useful, but can also get messy. Right-click on the Browser to expand or collapse all folders, which will clean up your visual instantly.
2) Arrow keys
Use your keyboards arrow keys to navigate between folders and sounds within the Browser. Up and down move the selection up and down (duh!) and the right arrow key plays the currently selected sound back to you.
3) Import Methods
There are a number of ways to import an audio file into FL Studio to work with. Right-click on an audio file to open it into a Slicex, Fruity Granulizer, Sampler or Fruity Slicer. Clicking and dragging will, by default, open a Sampler.
4) Search
If you're like me, you have hundreds upon hundreds of samples. And that's just my drum on shots! Within your Browser you can hit Cmd (Ctrl on Windows) + F to find a file within the Browser. Hours saved!
5) Browser Snapshots
Because you'll be using your Browser for a lot of different things, it will look different at various stages of your production process. Press a number from 1 to 9 to select a snapshot of the Browser. Press the same number again to save the Browser's current state to that snapshot. Now you can reload them quickly to navigate faster and speed up your music making.
6) Hide Browser
Hide the Browser by dragging the right side of the window all the way to the left. Pull it back out to the right to show it again.
7) Pattern/Song
Use your L key to quickly switch between Pattern and Song playback modes. Another one you’ll be using a lot in the future.
8) Undo History
Navigate to Current Project > History to see all of the actions performed in the project. Click on a previous one to automatically undo all actions between them. This can be super useful if you add a complicated part and don't like it. Or if you accidentally delete something!
9) Autosaved Backups
Sometimes we make too many mistakes, and just want to go back in time. Luckily, you can do that! Simply press Backup and select the autosave of your project that you want.
10) Add New Folders
If you want to add some new sounds and samples in, then all you have to do is navigate to the Options > File Settings menu. Here you can add new folders in the folder list, and they will subsequently show in the Browser.
11) Add To Channel While Browsing
Simply hold shift to add the sample to the selected track in the Channel Rack while browsing. This functions like a ‘hot swap’ function and allows you to audition different samples in place of another.
12) Scores
You can add pre-set MIDI clips from the browser to any instrument on the Channel rack. They are under the ‘Scores’ folder, but you can also use third-party MIDI clips from online, or ones you have exported.
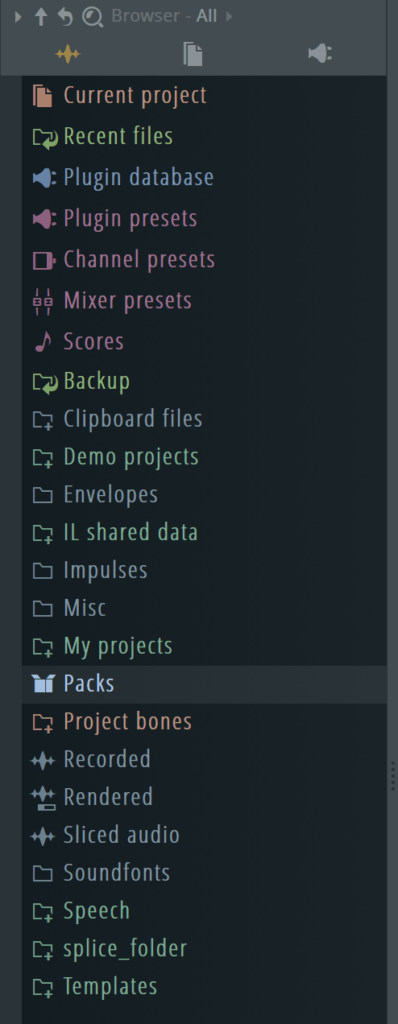
13) Plugin, Channel and Mixer Presets
Despite what many people say, presets are great. They can either serve as a good starting point to build your own ideas with, or they can just form a part of your track! Using presets is fine! FL Studio's Browser has three folders towards the top, full of presets for you to check out!
So there are some tips about the Browser. Get your head around those to really enhance your FL Studio knowledge! Now, let's move on to Channel Rack.
Tips for the Channel Rack
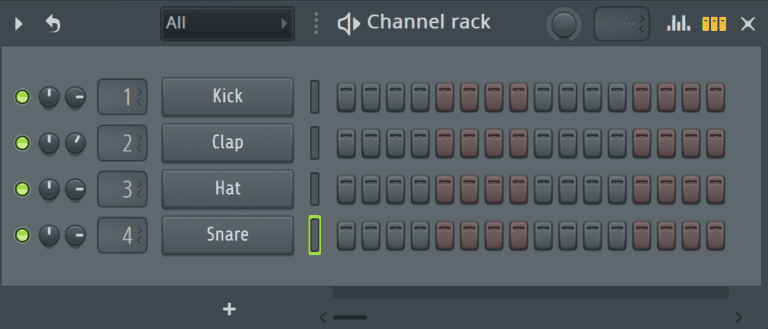
In FL Studio, the Channel Rack is where a lot of the creative idea making will happen. We mentioned in the previous guide that this is a really unique part of FL Studio, and it's a super fun little idea machine. Build your ideas here, then move them over to Arrangement to build up a full track.
So let's explore some tips.
1) Fill Steps
If you want to create a straight rhythmic pattern, just right-click on a channel and select Fill each 2, 4 or 8 steps. This automatically fills the selected rhythmic intervals, without you even having to click them or move the mouse.
2) Purge Unused Audio Clips
This is a useful bit of housekeeping. If you want to remove any audio clips that are taking up space, just right-click on a channel and click Tools > Macros > Purge unused audio clips. This instantly deletes any clips from the Channel Rack that weren't being used.
3) Zip / Unzip a Channel
You can hide channels by hitting Alt + Z. Now its name isn't shown. Want to bring it back? Hit Alt + U to unzip it.
4) Cut Itself
Not as depressing as it sounds, this mode ensures you don't have any overlap in notes that could be creating mud in your tracks. Right-click on a channel and select 'Cut Itself' and this will stop a note playing once another note in the step sequencer begins.
5) Reverse
In FL Studio's sampler, you can reverse sounds by heading over to the Precomputed effects section and enabling Reverse. Reversing sounds is always fun, you never know what kind of interesting results you'll get!
6) Save Channel State
Sometimes you want to save things as they are, to ensure there are no unwanted or accidental changes. Whether it's a native or a third-party plug in, just head to the Menu in the top left of the window and select 'Save channel state as' which saves the presets and effects on your channel, and adds them into the Browser.
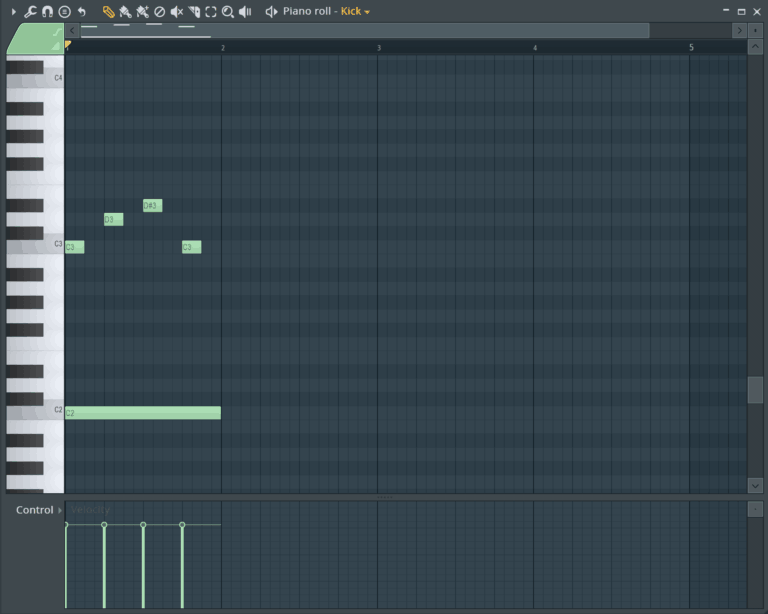
7) Time Stretching
You can mess around with the time of an audio sample within the sampler. Adjust the mode, pitch shift or time stretch controls to have some creative fun with a sample, without having to load up Edison.
10) Graph Editor

Use the Graph Editor by clicking on the graph icon in the top right of the Channel Rack. I love this feature, it gives you hands on quick access to change and adjust velocity, pitch, pan, note values and much more right from the step sequencer – without having to open the Piano Roll.
11) Main Swing
There's a dedicated Swing knob which allows you add swing to your patterns really quickly and easily.
12) Reorder Channels
If you're like me, you can get a bit nitpicky with how your channels are sorted. No problem, FL Studio has you covered! Just use Alt + Up/Down to move the selected channel up or down in the order. Now you can organise things just how you like them!
13) Next/Previous Pattern
Building off the previous tip, if you want to just move between patterns instead of move them around, simply press Shift + Cmd (Ctrl) + Up/Down to navigate between them. If there is no next pattern, it will create a new one automatically.
14) Lock to Keyboard
It can be useful to have something to go to for reference, or maybe there's just one sound that you always want to be only a key's tap away. You can lock a sound to the keyboard by right-clicking and selecting Receive notes from > Typing keyboard. Now the keyboard will always play notes from that track until you disable it.
15) Sampler Envelopes
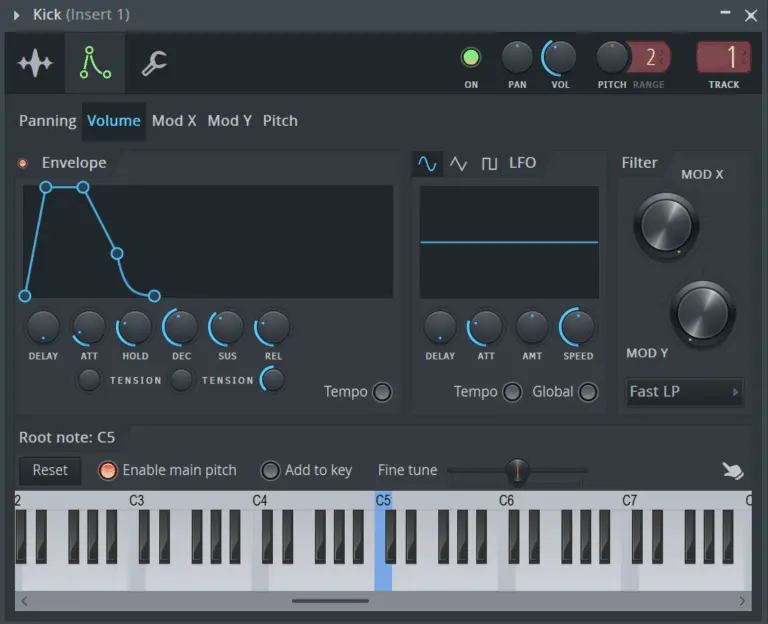
This is a really neat trick. Once you load up a sample into a sampler channel, there's an envelope icon up at the top. Select this and you can activate envelopes for all sorts of parameters: Volume, Pitch, Panning and Filter/Modulation. It's a great feature!
16) Quick Render
Sometimes you come up with a great pattern and you want to bounce it to an audio loop. To do what, head up to the menu, hit Patterns > Quick render as Audio file. This will then bounce it into an Audio section of the Channel Rack, and now you can use it in your full track!
17) Fruity Dance
I love this little thing. If you need a little companion while you make music, load up an instance of Fruity Dance and you'll have a little avatar dancing away as you make your tune. Then you wont' be plagued with worrying whether your music is bad or not, because someone is already dancing to it!
18) Layers
If you want to trigger multiple sounds from the same pattern, load up a Layer instrument. Once you’ve done that, select the two channels you want to layer and hit Set children. Now any notes you add to that track will trigger both instruments.
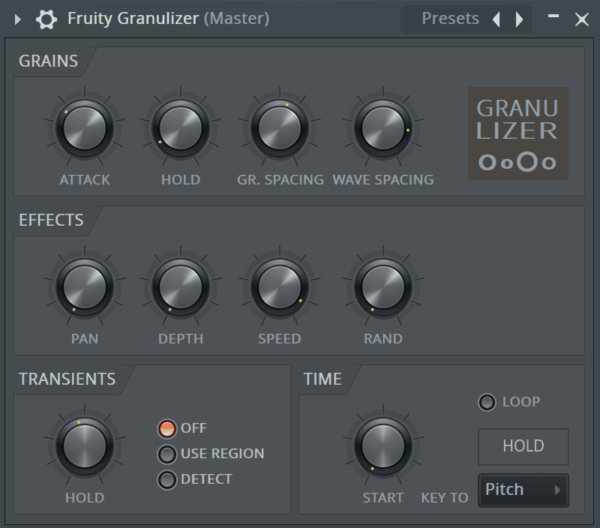
19) Fruity Granulizer
I lover Granulizer plugins, and FL Studio's is great. You can use this to get some really unique and interesting effects on audio samples, so load it up and have a play around!
Piano Roll Tips
I mentioned in our previous article that FL Studio's Piano Roll is a really great part of the DAW, and it's one of the reasons producers love it so much.
Even though it's technically a built in part of the Channel Rack, it's a super important tool. It's where you'll be creating any melodies, chords or harmonic parts in your tracks after all.
It has a lot of cool features, so let's take a look at some of them, so you can really get the most out of your Piano Roll.
1) Riff Machine
Sometimes, all it takes for inspiration to strike is a little bit of randomness. Luckily, FL Studio has got you covered. Within the Piano Roll, hit Alt + E to generate cool rhythmic patterns and chord progressions. It's always fun to work with generative music making software, and this little machine allows you to create random sequences that you can then mould into your own!
2) Randomize
Within the same menu is Piano Roll's Randomize feature, which generates quick random melodies. Great to play around with and see how different ideas sound over your music.
3) Colours!
Luckily, you aren't stuck with the Piano Roll's bland grey background. If you want to, you can change the colour by selecting View > Grid Colour or by pressing Cmd (ctrl) + Alt + G. Change it to whatever colour suits you!
4) Playback tool
Use the Playback Tool to quickly scrub through your MIDI and hear what notes are going on at any given time.
5) Let's do the time warp!
Just kidding. But here's a cool trick. If you select all your MIDI notes with Cmd (ctrl) + A, a scroll icon appears to the right of the selection. You can use this to stretch the timing of the notes. You can get some cool humanisation effects here, making sure your music doesn't sound too rigid or robotic.
6) Fine Adjustment
Similar to the above tip, if you hold down Shift + Scroll to move individual notes in line with the mouse cursor, you can get nice humanisation and swing to your notes.
7) Stamps
You can quickly insert full chords using the Stamp list in the menu. Instead of drawing in each note every time, you can just drag in a chord. They're all there, major, minor, add6, sus4 + 2. You name it. Super useful for saving time.
8) Quick delete.
You can quickly delete notes using the draw tool. Just right click. Saves you having to go and select the delete tool!
9) Auto Smoothing
If you've added in some automation and it's still not sounding smooth enough, enable Auto Smoothing in the Piano Roll menu to smooth out those automation curves, getting rid of clunky blocky changes.
10) Scale Highlighting
Don't worry if you're not too great with your music theory. It can be useful if you want to produce music, sure, but you don't have to know it. Head to Helpers > Scale Highlighting and choose the root note and the scale type you want. Then the background of the Piano Roll will light up the notes in that scale!
11) Octave Jump
Here's an easy one; if you want to move your notes up or down an octave, just hit Cmd + Up/Down.
12) Rotate Notes
If you've got a pattern looped in the Channel Rack, and want to move them or offset them but want them to still wrap around the loop, select them and press Shift + Cmd (Ctrl) + Left/Right. This will move them, but they will appear at the start of the pattern once they pass the end.
13) MIDI Import and Export
Maybe you've downloaded the MIDI to a great performance you like, or you've recorded one and want to export it. Head to File > Export as MIDI file or Import MIDI file, and you can do both!
14) Dump score log
I love this one. If you've played in some cool parts but accidentally deleted them, head to the main menu and press Tools > Dump score log and choose from either 2, 5, 10, 20 or 30 minutes into the past. It will load up what you played. It's like travelling back in time to find your sick riffs!
Playlist Tips
So, let's move on to the playlist. The place where you build your ideas and sounds into a full track. We've got some great tips for this section too.
1) Markers
Hitting Alt + T will add markers to your arrangement. These are a great organisational tool, as you can name and label the different sections of your track.
2) Marker Actions
Far from just labels, though, your Markers can have actions added to them. you can add time signature changes, loop or record points, and more!
3) Looping
Looping is just an integral part of making music in a DAW. Double click and drag the timeline ruler up the top to select a portion of your track to loop. Now, when you play you'll have just your selection looping. Great for working out the kinks!
4) Slip Tool
If you need to move something slightly, use the Slip Tool to drag your patterns left or right in the timeline. Press S or hold Shift to do this.
5) Select Similar Clips
If you've moved a pattern in several times, you can select all instances of it by hitting the little piano icon in the top left and selecting Select all similar clips. Now they're all under your control at the same time.
6) Merge Patterns
You can quickly merge any patterns on a playlist track into a new playlist by right-clicking on the track and selecting Merge pattern clips.
This will create a new clip which you can further edit in the Channel rack.
7) Track Resizing
A simple but effective organisational tip – drag the lines between the tracks to resize each one. Make your most important tracks bigger, and the ones you don't need to see as much, smaller!
8) Chop
Sometimes drum or percussion loops, or other transient-heavy audio clips can benefit from some precise editing. Click on the top left of an audio clip and select Chop to bring up a variety of options to slice the audio into different segments.
Now, depending on what the material is, the functions will be different, so make sure you experiment!
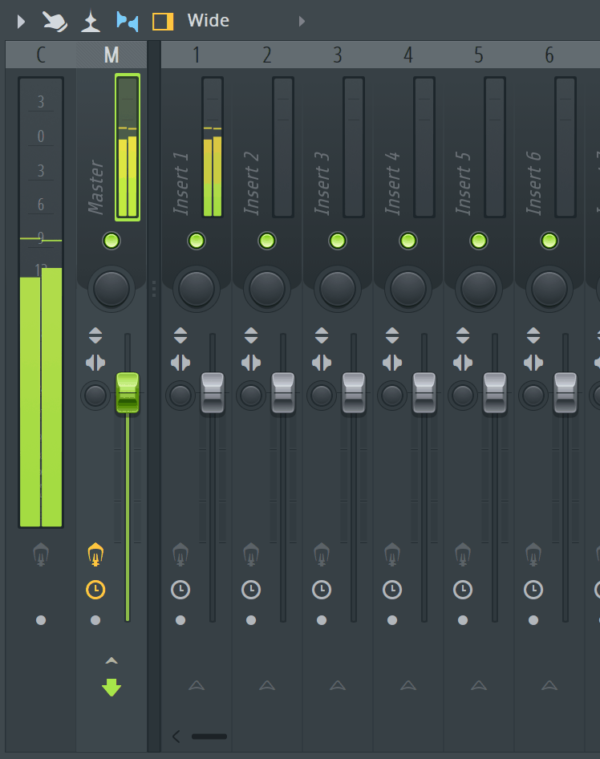
Mixer Tips
So, you've finished composing your tune, now it's time to mix it. A lot goes on in the mixing stage, so let's list some tips that will help you speed things along.
1) Channel Linking
Linking your channels to a mixer channel is easy. Press Cmd (Ctrl) + L on your selected channel to link it to the selected Mixer channel.
2) Quick Navigation
Pressing down on your keyboard will jump 4 tracks in the mixer, a good tip for speeding things up!
3) Docking
Adding on the the previous tip, if you're getting tired of constantly jumping between different tracks, you can dock the important ones. Right click on the track in question and select Dock to > Left / Right. This is a great way to keep your most important tracks in your view.
4) Separators
Now continuing the theme of organisation, you can add Separators in to help you visually group important tracks together. Right click on a track and hit Separator. This will add a thick bar so you can visually separate your tracks that are related to each other.
5) Waveforms
I like this one. Instead of seeing levels on your mixer, press Alt + W or View > Waveforms from the mixer menu, to see waveforms of the audio on each channel. A good way to visualise what's happening on each of your channels!
6) Mixer Layout Options
Finding out cool new things about FL Studio was one of my favourite parts of getting to know it. For example, there are 8 options for the Mixer layout! To see them all, select the Mixer layout option at the top of the Mixer - this is where it says Wide- and experiment with the options.
7) Built in EQ
There's a built in EQ feature of FL Studio's Mixer, it lives un the FX inserts for each track. It's a three-band EQ, so great for some small tweaks.
8) Moving around
Use Alt + Left/Right to move your mixer tracks around.
9) Loading Edison
To quickly add an instance of Edison to any track, Right-click and choose either Open audio editor or Open audio logger.
The first option opens a default Edison, the second opens one that starts recording straight away.
10) Fruity Peak Controller
This is loved by many FL Studio veterans. Map it to the volume of a mixer track and use it to side chain other elements!
Overview
So, we finally got there. Thanks for sticking with us.
That was a pretty hefty collection of some more advanced tips for use in FL Studio's various sections. Knowing your way around your DAW of choice is a super useful skill, and it saves you so much time in producing your music.
But remember, there's nothing like knowing all of the basics, so make sure you constantly refresh your memory on these and the basic tips we covered in our last article. You'll forget some, for sure, and you'll end up wondering how you ever lived without others.
As always, keep making good music, and thanks for checking in with us! While you're here, check out some of the great deals on our templates! They're a super valuable way to learn how the pros produce their chart toppers.
Take care!