Tricks for Working with Loops
Posted by Esteban Miranda on
The debate about the use of pre-made loops or samples in music production is one with very passionate beliefs on both sides. Some producers think using loops and presets is cheating, while others see absolutely no problem with doing it. In reality, this only comes into play if someone knows you've used pre-made loops or samples. Some samples can be super recognisable, but there's a lot you can do to ensure you change loops or samples enough so they have your own signature sound to them.
For many of us, if we began our music exploration journey on Garageband, we started by using pre-made loops and putting these together to create tracks. Even further back, I remember doing this with a program I got on a CD-ROM out of a cereal box (I'm showing my age there, aren't i?), called something like eJay 360 X-Treme or something. But I digress...
Using loops and samples is an integral part of music. Sampling is an absolute artform in the hands of many producers, and knowing how to manipulate audio and put your own stamp on a loop is a great way to make it sound like your own, and less like the pre-made loop it is. What you have to bear in mind when you're using a loop from a sample pack, for example, is that thousands of other producers have access to that exact same loop, so how can you process it and find the balance between maintaining the character of the original loop (because there's a reason you chose that one specifically), and disguising it so it isn't instantly recognisable as OldSchoolHipHopDrums005.wav?
Well, in this guide we are going to focus on some ways you can manipulate and customise loops. I'll share some of my favourite techniques for messing with audio and getting the most out of the loops I use in my music.
Messing with Transients
One of my instant go-to tricks for working with drum or percussion loops is adjusting the transients. I use a lot of percussive loops and sounds in my music, and I apply this trick pretty much across the board. Shaping the transients of a loop is a really good trick to explore its potential.
As a first port of call, this can dramatically adjust the character of a loop, and it can give you a really great jumping off point from which to apply even more effects.
So, there are a couple of ways I do this.
The first is to head over into Ableton's audio editor panel, to the Audio section where the various options for warping are. You can see this below.

I've got a drum loop loaded up, and you can see in the Audio section, I've selected the Preserve dropdown menu to Transients, with the Warp Mode being selected as Beats which ensures it will focus on the rhythmic elements in the music.
This means that when the sample is being warped, certain divisions in the sample are preserved as boundaries. Choosing Transients makes this process most accurate; it isolates every single audio event in the sample, and then by using the Transient Envelope (which is the blue box with 100 in it) you can really shape the sound.
A higher number preserves the transients of the original audio, unchanged, while bringing the number down attenuates the transients and really shortens everything, making it sound snappy.
I like really staccato drums and rhythmic pieces, so I naturally bring this all the way down to 0. However, this can sometimes sound unnatural depending on the audio I'm using, so there's a certain amount of trial and error necessary when applying this technique.
In the image below, you can see the results of what this same loop's audio file looks like with the Transients shaped right down to 0. The hard hitting rhythmic elements are still there, but the longer tails and background noise are cut down.

You don't even need to hear the two versions of this loop to understand how different they now sound. This can be a really good trick to use if you have a drum or percussion loop that has a lots of reverb or generally long transients, and you want to try and isolate the actual drum hits themselves.
What's also cool, is that under the Preserve dropdown, instead of selecting transients (which isolates every individual transient) you can select beat divisions, from 1 Bar down to 1/32.
This can impart some really interesting rhythmic accentuation to certain parts of your loop, while others are almost cut out entirely, so if you find the balance between the Transient Envelope and the beat division you want to use, you can get drastically different results from the same loop. Using this technique, you can add some really clear swing to the audio, or make it so that specific rhythmic parts are accented over others. It's really fun, and trying this out on 3 different loops would give you a whole world of different possibilities, so imagine the potential if you add this technique to your toolbox and use it whenever you need to!
Now, it's worth pointing out that this works really great on drums or percussion loops, but it's by no means limited to these types of audio. After all, all audio has transients, and you can get some really cool results if you apply this technique to different types of sample and loop. Try it on synth parts, or even on vocals. You can get some really strange sounds by doing this.
Ableton's Drum Buss
This is another really good trick to use on percussive loops, and it works in much the same way as the previous technique, but with a few more features. It's another way I go about shaping the transients and overall feel of percussive loops in my music.
You can use it in conjunction with the transient shaping trick I mentioned previously, or on its own. It also works really well on single hit samples, so if you want to really adjust the shape of a kick or snare sample you've found, then Drum Buss is a great way to do it.

Drum Buss has some really good tools for shaping the character of incoming audio.
Its design is based on the classic mixing technique of creating a drum buss; which means routing the audio from several drum tracks to one new one, where all of the signals can be processed as a single source. This traditionally helped producers and mix engineers take individually recorded drums and process them together so they sound cohesive and like 'one instrument'. This same technique is applied using Drum Buss if you throw it onto a group containing all of your drums.
But you can get some really nice results from it if you stick it onto an audio sample, and mess around with some of the features.
So, on the left hand side we have Drive, which in this instance is a gain knob, driving the signal through some nice distortion based on the three different modes;
- Soft is a waveshaping based distortion.
- Medium is a limiting-based distortion.
- Hard is a clipping distortion, as well as a bass boost.
Below these you also have Trim and Comp.
The Compression adds a bit of extra compression to the signal before it hits the distortion stage. The compressor has a quick attack, medium release and medium ratio.
The Trim option refers to the attenuation of the incoming signal. This is essentially an output gain control for the compression, as the attenuation is applied after the compression.
So, even with these signals on the left hand side, you can adjust the sound of an incoming signal in some really nice ways, but my favourite controls in Drum Buss are in the next section.
Transients is one of my favourite controls here. It emphasises the transients of the upper frequencies of the sound, while Crunch adds more distortion on the upper and middle frequencies, and Damp adds a low pass filter to tame some of the higher frequencies the distortion introduces.
So, using these first two sections, you can begin to carve out a really nice timbre to your sound, accenting the transients and really shaping it to your liking. It works quite similarly to the technique above, but applies it in a different way.
Now, the Boom control is where Drum Buss really shines. This control simply lets you add some really nice low end manipulation to your samples. It works by adding a super resonant filter to the low frequencies.
The Frequency control adjusts the frequency of this filter, so you can make sure the low end is in key with your music. This is shown nicely by the round button in the bottom, which snaps the frequency to the nearest exact note. If your frequency isn't an exact note, this button will show a plus or minus sign.
So, this required a bit of a detour into the functions of Drum Buss, but hopefully you can see why. Far from being just a drum processing plugin, you can use this on a variety of samples and loops, and get really creative with the character it brings out of them.
The Boom feature is a particularly good one, allowing you to tease some really juicy low end out of samples.
So, combining both techniques I've already mentioned, you can totally transform a loop from a reverb-heavy busy percussion loop, to a boomy and distorted low end monster. Shaping transients in a number of ways is a great way to really transform the character of loops and samples. But it isn't the only way!
Chopping
One of the classic ways to alter samples has stood the test of time because it's so simple, but so effective.
And that is the good old technique of chopping up a sample, which can be a starting point for several other things.
The first of which is simply taking drum hits you like from an existing loop.
Drum hits which are present in an existing loop will have been processed, as well as being layered with other sounds. This will give them a bit more interest in the character of their sound than a simple one shot sample.
If you have some pre-processed drum loops sitting in your sample folder, scan through them for any particular sounds you like, and then you can isolate that sound and chop it out of the loop.
It may have some really interesting background noise, or rhythmic interest because of other percussive sounds from the background of the original loop.
But this isn't the only thing you can do with chopping up a sample loop.
Another trick I love to use is throwing a sample onto an audio track, and then listening to it on loop over and over again. Once you do this, small sections of it will begin to stand out to you. What you can then do is move your loop markers to this smaller section, and then listen to this smaller part. Weird rhythmic patterns will jump out at you, and you can take this small section from the loop, move it onto a new audio track and then move it so it's emphasising a different rhythm to what it was originally.
This can be a really cool way to mess with percussive loops; chopping out small sections of them and repurposing them to create new beats.
Slicing to MIDI tracks
This another favourite technique when working with audio loops. And it can be super effective for melodic or hamonic parts.

When you process audio samples within Ableton, there are some cool things you can do with the warping process. We have already discussed adjusting the transients of drum or percussion samples using Ableton's warp modes, but another favourite tool of mine when I'm processing samples is breaking them up into slices onto a new MIDI track. Luckily, there's a really nice quick way to do this.
Select a sample you like, and load it into an audio track in Ableton. When you right click, you'll see an option called Slice to New MIDI Track.
This then brings up a menu where you can select options for how you want the slicing process to be applied. (Pictured below)
You can choose from options which put each individual transient onto its own MIDI note, or this can also be done with Warp Markers, which you can add in yourself. This option can be really useful for experimenting with the different sounds within a sample and lifting ones out to create your own sequences. But there are also rhythmic based options too, so you can have different length note divisions put onto their own MIDI notes, which is great for rhythmic playback of a sample. Each MIDI note would be a 1/4th note, and so on.

What you then get, is a MIDI sequence in which each note is a different section of the audio sample, playing chromatically up a scale.
When you solo this new MIDI track and hit play, you can then hear the audio sample play essentially unchanged. But this is the part where you can get really creative.
Experiment here with changing the order in which the notes play, which can instantly create some glitchy and beat repeat-type effects. You can also omit some notes entirely, and repeat others. There's really no limit to what you can do here.
What I really love with this is that the results can really vary depending on what audio you put into them. I've done it for individual samples before, and then gone on to use those MIDI instruments to create ideas for tracks, but I've also finished an arrangement of a track, and then bounced it out as audio, and reimported it to do this process. You can then essentially do a mini-remix of a full arrangement you've already created, and applying the different techniques of manipulating the MIDI slices can get you some really fun sounds.
Saving your Presets
Chances are, if you have a few different techniques you use for maniupating samples and loops, you'll have some go to techniques and tools you use in specific scenarios.
It can be a big time saver and really useful to save these as channel presets, using Ableton's Audio Effects Rack system to save a channel strip setting.
This can be a great way to quickly access your go-to tools for manipulating certain kinds of samples.
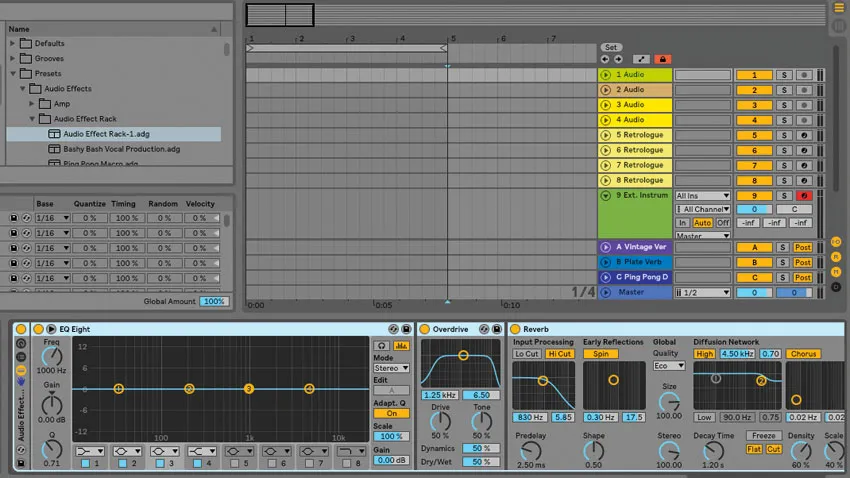
If you know that every percussion sample loop you bring in is going to be put through Drum Buss, as well as have some filtering, EQ and Compression, you can save these all as a Channel Strip Setting, so you can instantly load up this combination of devices rather than hit them one by one.
It may seem like a small time saver, but this can really help you stay efficient when you're working.
Background Ambiance (for studying and relaxing 24/7 live)
Over the past few years I've noticed YouTube is inundated with all sorts of Ambiance and soundscape videos. Whether it's a cosy cottage, a rainy castle bed chamber or Hogwarts' grounds, there's an ambiance video for it.
What's interesting about this is that it seems to have arisen as a solution to our appreciation of physical spaces; there's nothing quite like recreating the sounds and ambience of a specific place to create an emotionally transportative state in the audience.
And this exact same technique can be used to great effect in music production.
Creating a sonic 'bed' on top of which your music can exist is a really good way to add some dimension and excitement to your music, and the beauty here is that you can use a whole host of different types of samples to achieve this.
Many sample packs will contain audio recordings of real places; cafes and restaurants, busy city centres or desolate, rainy beaches. All of these types of samples can obviously be used to underpin your music, but you can get far more creative.
A good trick for applying this concept to drums is to take a single instance from your drum sample; perhaps an 1/8th note and repeating it under your main groove, super quickly like a machine gun.
You can then use a mixture of side chain compression, volume attenuation and perhaps even reverb and filtering to help it interact with your main groove. The idea here is to create a bit of an interaction between this wash of sound and your main drum pattern, which helps prick up the listener's ears.
I use a lot of piano in my music production, but I'm always looking for ways to make my music sound different and exciting.
I apply this ambiance technique when I'm using piano in my music; I'll write my piano part, and then send it to a really lush and washy reverb, with the dry/wet on 100%. I also sometimes use Output's Portal plugin, which is a really nice granular plugin that achieves some beautifully washed out sounds.
I think of it as taking the harmonic essence of the piano part and creating a reverberating, lush backdrop from it. So I resample this onto its own audio track, and then I bring it in underneath the piano part and subtly mix it together.
So instead of having a normal piano part, it's got this exciting and dynamic 'living' reverb underneath it. This effect can be exaggerated by reversing the MIDI notes when creating the audio; so the harmonic base is still there, but there's harmonies and interaction between the dry piano and the backdrop of audio.
The sky's the limit!
The techniques listed above are just a few of my favourite ways to incorporate samples into my music (whether they're ones I've made myself, or pre-made loops from sample packs).
There's really no limit to how you can warp and manipulate audio samples brought into your DAW, and these are just a few of my go to techniques that I know I'd use in certain scenarios. But I got to these largely by experimenting.
I'd say overall, that's the most important tip I could give for working with samples. I've always gotten the best results by experimenting with audio; picking a random effect and seeing what it does to my audio, and continuing this process.
It's a really fun part of the music making process, and experimentation should always be integral to how you make your tracks. Experimenting with sample manipulation and audio is a great way to bring some new flavour into your tunes, so be sure to let us know in the comments if there are any ways you have discovered to manipulate audio samples in a cool or exciting way!
Thanks for checking in with us here at Top Music Arts. While you're here, be sure to check out our Ableton Live project templates, where we have a range of deals. You can download these templates and have a deep dive into what makes a professional grade track work. Our team of producers are based all around the world, and they are constantly working to reproduce some of the biggest tunes in the EDM industry to a top standard, and these could be yours to dive into to get all of the tricks and techniques to apply to your next project!